Philippines Itinerary: Island Hopping in Paradise
Are you planning a trip to the Philippines?
But you’re overwhelmed by all the different destinations and can’t come up with a good itinerary?
I get it. That’s how I felt when I was first planning my trip to the Philippines. There are so many different islands: Cebu, Bohol, Palawan, Boracay, Sirigao, and Mindanao that it can be hard deciding which ones to visit and which ones to skip.
I found that the best way to travel around the country is to focus on one island group instead of flying from one to another. In this post, I’m going to share with you one Philippines itinerary centering around Cebu and its surrounding islands. Use my recommended route to give you ideas in planning your trip.
Cebu is a great area to focus on as it’ll give you a good variety of landscapes, beaches, waterfalls, wildlife, and Filipino culture. You usually can’t find this much diversity in other parts of the Philippines.
So let’s dive into this 3 weeks in the Philippines itinerary!
Disclosure: This post may contain affiliate links. As an Amazon Associate and a Bookshop.org Associate, I earn from qualifying purchases. Please see this website's Disclosure for more info.
In This Philippines Itinerary Post, You’ll Find…
About Cebu, Philippines
Located in the Central Visayas region of the Philippines, Cebu is one of the most developed provinces in the country. Cebu is both the name of the main island and the largest city in the province. There are an additional 167 smaller islands surrounding it.
Cebu (pronounced Seeboo) comes from the local dialect, Cebuano, and means “trade.”
Historically, Cebu is one of the most important provinces in the Philippines. It was here where Ferdinand Magellan landed and where he died. Cebu is also where after defeating the local ruler (a Malay-Tamil ruling family), the Spaniards constructed their first settlement in the Philippines. The Spaniards then renamed the island “The Town of the Most Holy Name” (thank goodness it didn’t stick).
The city of Cebu has the grand nickname, “the Queen City of the South,” but it doesn’t offer much to see for international travelers, so I haven’t dedicated any time in this Philippines itinerary to the city.
PRO TIP: No one likes to think about insurance, but accidents do happen. I highly recommend getting travel insurance. During my travels over the past 2 years, I've been using SafetyWing for my insurance. They're very affordable for all ages, and digital nomads can use their insurance long-term.
Day 1: Manila
Most travelers begin their Philippines itineraries in Manila mainly because it’s got the cheapest airfares. Check Skyscanner for deals to the Philippines. That’s what I do and then you can book with the airline.
You can also arrive in Cebu, and if you can find a cheap flight for Cebu, then I suggest skipping this step and flying directly into Cebu.
Getting from the Manila Airport to your Hotel:
The best way to get from the airport to your hotel is by taking a yellow taxi. My taxi cost me 485 pesos (US$10). You can read more about the transportation methods from the airport to your hotel in my First-Timers’ Guide to Getting Around Manila post.
Where to Stay in Manila
The best area in Manila to stay in is Makati. It’s safe and it’s filled with lots of bars and restaurants. The downside is that it’s got terrible traffic jams and it’s far from Manila’s tourist attractions.
The next best area to stay in is the old part of the city near Intramuros. This area isn’t as safe and is a bit sleazy, but it’s easier to get to the tourist attractions.
Here are some options on where to stay in Manila:
- Lub d’ Philippines Makati ($) (Hostel World | Agoda | Booking.com) is a good budget option with comfy and clean dorm rooms and stylish private rooms. This is where I stayed and I would stay here again.
- City Garden Hotel Makati ($$) (Agoda | Booking.com) is a decent mid-range option in Makati.
- I’M Hotel ($$$) (Agoda | Booking.com) is a more upscale and stylish hotel located in Makati.
Where to Eat in Manila
I’m not crazy about Filipino food like I am about Thai, Japanese, or Vietnamese food. But the one thing that Filipino food has that those cuisines don’t have is a kick-ass breakfast. And you can eat it at any time of day. Kanto Freestyle (Google Maps) is a restaurant in Makati that serves breakfast (both Filipino and western breakfasts) 24 hours a day.
Manila Itinerary
Day 1 is a throwaway day for me as a traveler. I’m usually jetlagged and getting used to the heat.
It doesn’t matter what time you arrive. Getting around Manila is time-consuming. Traffic is so bad that sometimes it takes 30 minutes to go one kilometer. You could lose a whole day just by hopping in a taxi.
Food Tour
If you arrive in the morning and you’re not too jetlagged, you can start your itinerary of the Philippine with a food tour. I did this food tour of Chinatown with YOLO when I first got to the Philippines and it helped me know what to eat, how to eat, and how to order in restaurants for the rest of my trip. I loved it! It was definitely a 5 out of 5 stars.
Bar and Restaurant Tour of Makati
Another option on your first day in the Philippines is to do a tour of the bars of Makati (also called Poblacion). I did a fun bar and restaurant hopping tour with Z Hostel in Makati. I was fabulous! The tour introduced me to the culture and history of Manila and to some great bars and restaurants in the area I was staying in (Makati). I wasn’t staying at the hostel, but I still got on the free tour (tip-based).
You can check out my Manila itinerary blog post for more details regarding these two not-to-miss tours.
More Manila Tour Ideas on Day 1: If you’re not able to book the two above tour recommendations, there are plenty of other options. These tours are the ones that for me looked the most interesting:
- Manila Nightlife Tour – This tour is great if you’re traveling alone and you still want to enjoy the bars and clubs of Manila! Rating: 5 out of 5 stars Check reviews and price
- Philippines Street Food Tour – The meeting tour for this tour is closer to Makati than the Chinatown Tour and it covers the street food of the Philippines, making it valuable preparation for the rest of your time in the country. Rating: 5 out of 5 stars (195/204 5-star reviews) Check reviews and price
- Manila’s Night Market Tour – This tour starts in the evening, making it a great option for those who want to rest in the afternoon after their long flight. Rating: 5/5 stars Read reviews and check price
Days 2 – 6: Bohol + Pamilacan
Your first major stop on your Philippines itinerary is going to give you a chance to see something other than just beaches and waterfalls.
Bohol is where you can see the famous Chocolate Hills (the image at the top of this page) and the tarsier primates up close and in the wild. Bohol also gives you a chance to do some kayaking through mangroves, or paddleboarding down a jungle-clad river.
Don’t worry!
The island also has some spectacular beaches and opportunities for snorkeling, diving and island hopping.
How to Get from Manila to Bohol Island
On day 2 in the Philippines, fly from Manila to Bohol Panglao Airport. Luckily, there are several flights per day, and it only takes about an hour and a half. You can check the schedule and ticket prices on Skyscanner or 12Go.
Where to Stay on Bohol Island
There are 4 main places where people often stay on Bohol Island:
- Tagbilaran – The main city on Bohol; lots of local culture and affordable places to stay but far from beaches and it won’t be very peaceful. Don’t stay here!
- Panglao – A smaller island connected to Bohol by a bridge. Great beaches and main tourist infrastructure here! Stay here!
- Loboc – A small city in the center of Bohol; you’ll be surrounded by jungle; get a place to stay right on the river. Good for one or two days.
- Anda – A remote beach destination that’s great for relaxing. It’s an alternative option to visiting Pamilican Island on days 6 and 7 of this itinerary.
The BEST area of Bohol to stay in is Panglao. It’s got the best beaches, the best nightlife, and lots of restaurants and cafes. If you want beaches but less touristy, try Anda.
Where I stayed in Panglao
Bohol Coco Farms ($)
I stayed at Bohol Coco Farms and loved it! It’s great for budget travelers. I love the dorm rooms because they actually have windows and no bunk beds! They also have private bungalows, too, for those who don’t want dorms.
There’s a great social area with lots of hammocks and places to socialize. The staff can help arrange tours for you. Best of all, it’s within walking distance of some of the quieter beaches on Panglao.
To get to the popular Alona Beach, you’ll need to get a tricycle or hop on a bus or get your own wheels. It’s got a 9.7/10 rating on Hostel World. Read Reviews and Check Prices: Hostel World | AGODA | BOOKING.COM
Other Hotel Options in Bohol
Bohol Beach Club ($$$)
You’re right on the beach here at this resort! Can’t beat that! RATING: 9.1/10 (Booking.com | Agoda)
Amarela Resort ($$$)
Terrific location; Quiet and peaceful; a great place to chill out; beautiful décor! RATING: 9.3/10 (Booking.com | Agoda)
Blue Planet Panglao ($$)
A highly-rated place with a swimming pool! RATING: 9.3/10 (Booking.com | Agoda)
Tyner’s Place ($$)
Great location near Dumaluan Beach! RATING: 9.3/10 (Booking.com | Agoda)
Check out my Bohol Travel Guide for more ideas on where to stay in Loboc and Anda.
Bohol Itinerary
For tour ideas, ask your hotel or hostel for ideas or visit the tour agencies at Alona Beach. Better yet, check out the listing of tours on Klook or Get Your Guide.
Day 2: Fly from Manila to Panglao Airport in Bohol + Check out Alona Beach + Firefly Kayaking Tour
Day 3: Countryside Tour – Tarsier Sanctuary, Chocolate Hills, Hanging Bridges, and Baclayon
Day 4: Scuba diving or Island Hopping Tour that includes a trip to Virgin Island and Balicasag Island
Day 5: Pamilacan Island – Do a day trip or stay overnight on this tiny, remote island. You can snorkel with turtles and go dolphin watching.
Day 6: Return to Bohol in the morning and either spend it on the beach or head on to Anda or Loboc for the day
PRO TIP: Bohol is a big island, making it difficult to get around. If you don’t drive a motorcycle or scooter, the best thing for you to do is join a tour.
Days 7 – 10: Siquijor + Apo Islands
Next, you’re going to island hop from Bohol to Siquijor, one of the most fun islands in the Philippines.
The island has two nicknames. The first one is “The Island of Fire.” Back when the Spaniards were first colonizing the Philippines, the island looked like it was on fire from all the fireflies. Sadly, I didn’t see any fireflies during my time there.
The other more provocative name is “The Island of Witches.” The island is famous for its healers and shamans. Fortunately, I did get a chance to visit a shaman and you can find out how to experience one too in this guide on the best things to do in Siquijor.
The secret to finding its charm and hidden gems is to get your own wheels (scooter or motorcycle) and follow my 4 days in Siquijor Itinerary. If you’re like me and can’t drive or are scared to death of driving something with two wheels, you can hire a guide/driver and motorcycle (read my Siquijor Travel Guide to find out how).
With your own vehicle or a guide/driver, you can find Siquijor’s beautiful beaches with water as placid and clear as a bathtub, picture-perfect sunsets, healthy reefs for snorkeling, stunning waterfalls that you can swim in, and its culture of shamans and witches.
How to Get from Bohol to Siquijor
To get to Siquijor, you’ll need to take a ferry. Ferries for Siquijor leave from the Tagbilaran port on Bohol. They arrive at either Larena Pier or Siquijor Pier on Siquijor Island.
First, try buying your ferry ticket from the 12Go website. If they’re sold out on the website, head all the way over to the Tagbilaran Pier in Bohol to see if they have any. Most likely they do.
Departure Times from Bohol:
- 8:00 pm – 11:00 pm (Larena Pier) – US$12
- 3:20 pm – 5:20 pm (Siquijor Pier) – US$16
- 10:00 am – 12:30 pm (Larena Pier) – US$13
I took the 10:00 am ferry and arrived in Siquijor at 12:30 pm.
Before I had arrived, I arranged for my guesthouse to pick me up at the pier for US$5. The pier is quite far from where most people stay on the island.
Where to Stay on Siquijor
The best area of the island to stay on is on the San Juan side of the island. You want to get as close as you can to either Tubud Beach or Paliton Beach—they both have stunning sunsets.
I stayed at TAGBALAYON Lodging House, right across from Tubud Beach and Marine Sanctuary (you can snorkel off the beach). It’s still highly rated on Hostel World at 9.3/10 and Booking.com at 9.4/10 and on Agoda it’s also a 9.4. The hotel has dorm rooms and private rooms. The dorm was clean, the staff was friendly, the location was superb, and they offered an inexpensive breakfast. I loved how the staff greeted every guest by name every day. My only complaint was the showers flooded and the dorms were too tightly packed together.
Another fantastic hostel is Fable Hostel near Paliton Beach. It’s newer than the place I stayed at and it’s got great reviews: 9.8/10 on Hostel World.
If you want something more comfortable, Siquijor has lots of other wonderful hotels. For a medium-priced hotel try Isla de Paz Beach Resort. It’s right on the beach, gets great reviews, and is at an affordable price. Check reviews and prices on Booking.com or Agoda.
Across the road from my hostel was The Coco Grove Beach Resort. This gorgeous hotel is right on the beach! They have a swimming pool. I booked my Apo Island tour through them, so I got to experience a bit of its luxury service. Check reviews and prices on Booking.com or Agoda.
Siquijor Itinerary
I have a more detailed itinerary for Siquijor here that explains exactly how to get from Siquijor to Moalboal.
Day 7: Travel to Siquijor + Spend time snorkeling off of Tubud Beach and Marine Sanctuary
Day 8: Island Tour to waterfalls and hidden beaches (with this tour, you can add a chance to swim with sharks)
Day 9: Apo Island Tour to swim with sea turtles
Day 10: Countryside Tour (visit a shaman) + Depart for Moalboal
Looking for more off-the-beaten-path destinations?
Days 11 – 12: Moalboal
Moalboal turned out to be my least favorite stop on this 3 weeks in the Philippines itinerary. The beach is ugly and the town is even uglier. The main beach is about as big as a driveway and the sand is about as far as you can get from white powder.
However, it’s still worth visiting for two reasons: the Sardine Run and Kawasan Falls.
How to Get to Moalboal from Siquijor
This was one of the most stressful travels I had in the Philippines.
There’s only one ferry per day that travels from Siquijor to Liloan on the main island of Cebu. It leaves from the Larena Pier in Siquijor at 5:00 pm and arrives at 8:00 pm. island. You currently can’t buy tickets online, but perhaps in the future, you will be able to. I like to use 12Go to buy ferry tickets.
When I did this trip, all the buses to Moalboal had already left from Liloan, so I had to get a taxi. Luckily, I met a German couple who agreed to share a taxi, so the price was more affordable for me (US$24 for three people).
Where to Stay in Moalboal
Most people don’t stay inside Moalboal town. They stay outside near Panagsama Beach, which is about 15 minutes by tricycle from Moalboal. The best booking sites for Moalboal are Booking.com, Agoda, and Hostel World.
I stayed at Crazy Bears Hostel. (Hostel World | Agoda | Booking.com). I wasn’t as crazy about Crazy Bears. The dorms are windowless and cramped. The private rooms are a lot better. The breakfast, though, is fabulous and the location is good—within walking distance of the beach where you can do the Sardine Run, and it’s near good restaurants.
If you’re looking for dorms, the Maayong Hostel gets better reviews: clean and friendly (Hostel World | Booking.com | Agoda). Chief Mau gets good reviews, but it’s a party hostel with loud music all night long that you can hear from your room (Hostel World | Booking.com | Agoda).
For something more upscale, I’d stay in the highly-rated Tongo Hill Cottages. Not the best location but the bungalows are cute and the reviews are fabulous! (Booking.com | Agoda).
Moalboal Itinerary
I scheduled just 2 days in Moalboal. Use my itinerary as a suggestion. You might fall in love with the place and want to stay longer. There are more waterfalls than just Kawasan Falls, but they’re harder to get to without a car.
Day 11: Dive or snorkel to see the Sardine Run off Panagsama Beach. You can rent life jackets from nearby shops if you’re not a good swimmer like me. Head to White Beach for a better place to relax.
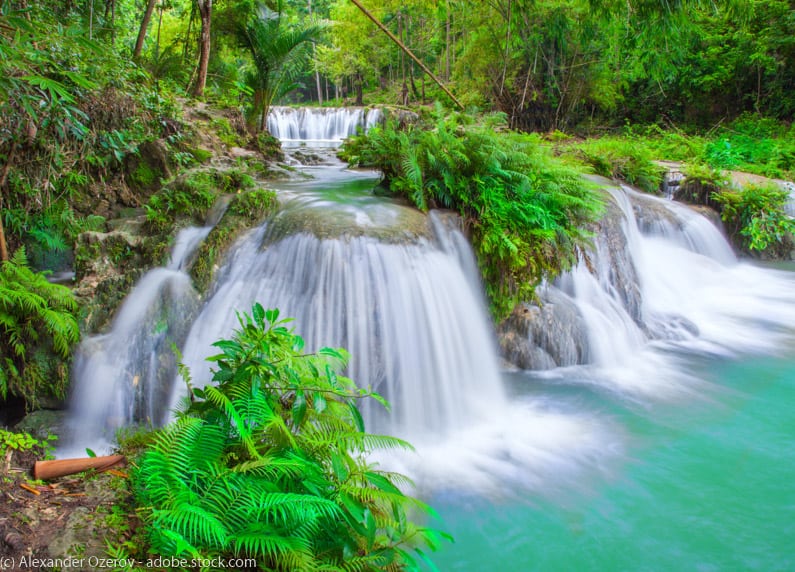
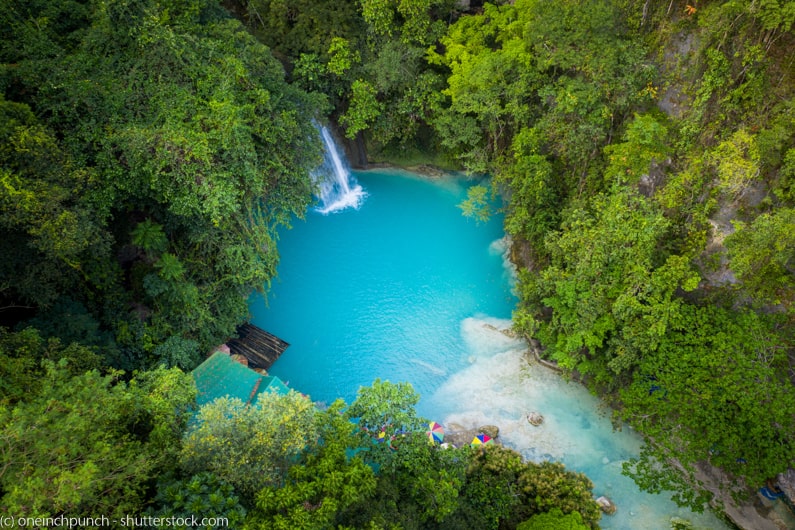
Day 12: Kawasan Falls – Here you can go canyoning or just swim in the waterfalls
SAFETY TIPS: Don't travel anywhere without bringing these essential items with you to keep you safe and secure:
Combination lock - You MUST bring a combination lock with you if you're staying in hostels. Hostels provide lockers and you provide the lock.
Money belt - Even though these are not the most comfortable things to wear, a money belt is essential. I've tried both these traditional travel belts and ones that runners use.
Anti-Theft Purse - Travel-on Anti-theft purses are great because they're made of a material that's difficult for thieves to slash. They've got lots of pockets as well and a way to lock the zippers.
Days 13 – 17: Malapascua & Kalanggaman Islands
For being such a small island, Malapascua surprisingly has loads to offer travelers looking for paradise: pristine powdery white beaches, crystal clear water, unique diving experiences, and an opportunity to play Robinson Crusoe. It’s one of the most underrated islands in the Philippines and it turned out to be one of my favorite spots during my 3 weeks in Cebu.
The island is most famous for being the best place in the world to dive with thresher sharks. Your chance of seeing one is about 100%. If snorkeling is more your thing, there are also chances to snorkel around shipwrecks.
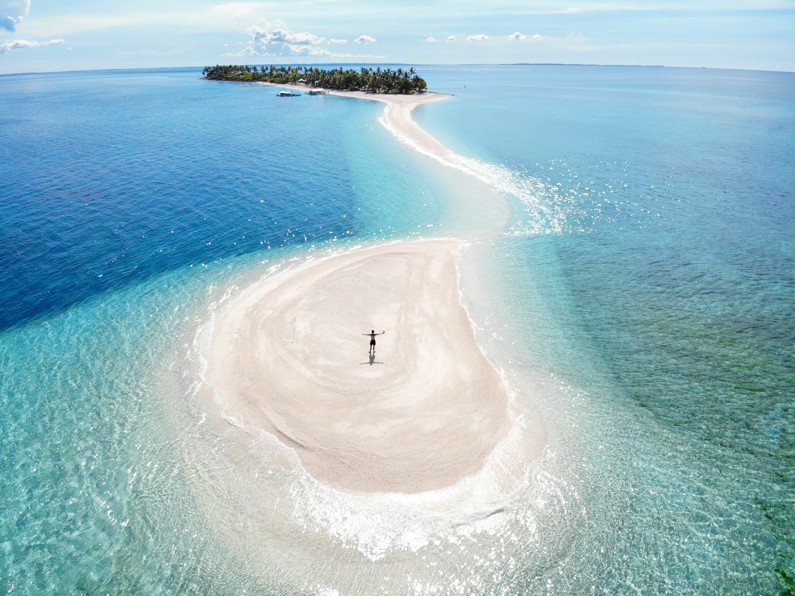
When I visited, I’d been in the Philippines already for almost 2 months and I just wanted to be completely lazy, maybe do some swimming, eat some seafood, and relax on a nice beach. I got more than that. I ended up going to one of the BEST islands in the Philippines: Kalanggaman Island.
Do NOT skip Malapascua even if you don’t want to dive with thresher sharks.
How to Get to Malapascua from Moalboal
Getting to Malapscua from Moalboal in one day is complicated but doable. The key is to leave very early in the morning and get to the port of Maya by 4:00 pm. You do NOT want to stay in Maya. Not that it’s dangerous. It’s just a boring town.
Read my Malapascua blog post on EXACTLY how to get to the Island from Moalboal. You can check prices for private transfers here.
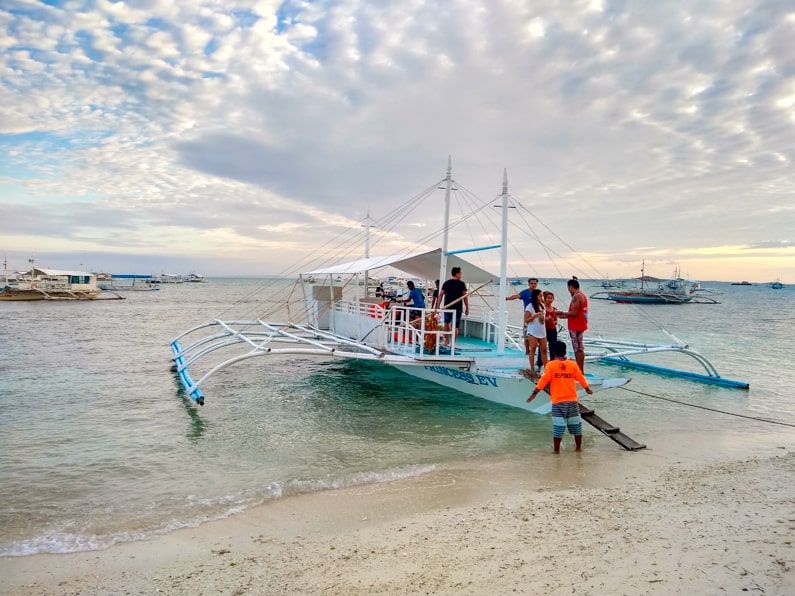
The photo below is of the ferry I took to Malapascua.
Where to Stay in Malapascua
I stayed at Malapascua Budget Inn (Booking.com) near Bounty Beach, but I wouldn’t recommend it. The location was good and there was a nice rooftop terrace, but other than that the bathrooms were gross and the dorm rooms were windowless prison cells.
Here are some other options:
Malapascua Garden Resort ($$) – (Agoda | Booking.com) is a good mid-range option. Very conveniently located with better reviews than most hotels on the island.
Tepanee Island Resort ($$$) – (Agoda | Booking.com): Tepanee has gotten great reviews on booking sites. Great views and conveniently located with a nice private beach.
Malapascua Itinerary
Use these 5 days in Malapascua itinerary as recommendations on how to organize your Philippines itinerary.
Day 13: Travel to Malapascua (it will take all day)
Day 14: Kalanggaman Island (do a day trip or stay overnight)
Day 15: Return to Malapascua from Kalanggaman Island
Day 16: Scuba Dive with Thresher Sharks and/or Beaches on Malapascua
Day 17: Relax on the beach or go snorkeling (shipwreck)
PRO TIP: Here's a list of essential items to pack for all of your island-hopping tours while in the Philippines:
- Dry bag - Your stuff will get wet while on island hopping tours so a dry bag is ESSENTIAL for the Philippines.
- Waterproof bag or pouch for your cell phone especially for your visit to such places as the Big Lagoon and the Secret Lagoon in El Nido and island hopping in Port Barton.
- Water shoes - It's important to have a pair because sometimes you'll need to be walking on rocks to get to your destination. You'll thank me later for bringing them.
- Sunscreen - You buy sunscreen in the Philippines, too, but it's pricey (500 - 700 pesos depending on the store--shop around!)
- Mask and snorkel - I recommend bringing your own mask and snorkel. If you're new to snorkeling, start with the full face mask and snorkel. That's what I did.
Day 18-19: Cebu City & Oslob
Use Cebu City as a base to do a tour to Oslob to swim with whale sharks. There are loads of tours to choose from. I recommend arranging the tour ahead of time before arriving in Cebu City because tours start very early in the morning. It takes 3 hours to drive from Cebu City to Oslob.
Most tours include several stops: (1) Oslob (2) Tumalog Waterfalls (3) Sumilon Island. Some tours also go to Moalboal, but since you’ve already been there, don’t do those tours.
How to Get to Cebu City from Malapascua
It took me half a day to get from Cebu City to Malapascua by public bus. I arrived at my accommodations at 1:30 pm. You can follow my instructions on how I did it in my Malapascua Itinerary blog.
You can also arrange for a private car and driver to pick you up when you get off the boat from Malapascua in Maya.
Where to Stay in Cebu City
I’ve stayed at 3 places during my two trips to Cebu City:
- Happy Nest Hostel,
- Murals Hostel and Café,
- Cebu Parklane Hotel
I got sick when I was in the Philippines, so I spent around a week recovering in Cebu City between my travels in Palawan and Cebu.
I stayed one night at HappyNest. The neighborhood is a bit dodgy, but it’s close to the port. Rooms are windowless cells, but not as cramped as Murals Hostel. Read reviews and book your stay: Hostel World | Booking.com | Agoda
Murals Hostel and Cafe has a good coworking space with fast WiFi. It’s in a good neighborhood with a great café, but terrible bathrooms and cramped dorms. I don’t recommend this place but you can read reviews and book your stay: Booking.com | Agoda
Cebu Parklane Hotel is a more upscale hotel located across the street from a shopping mall, which makes it convenient for finding restaurants and shopping. Rooms are comfortable and there’s a rooftop pool with sauna. Read reviews and book your stay: Booking.com | Agoda
Cebu City Itinerary
Use this suggested itinerary for Cebu City to plan your itinerary.
Day 18: Travel from Malapascua to Cebu City.
Day 19: Go on a whale shark tour to Oslob. You get to snorkel with whale sharks. The rours usually include stops at Tumalog Waterfalls and Sumilon Island. You could fly back to Manila on the evening of Day 19. Flights go to Manila at all hours of the day and night.
Tour Ideas for Cebu City: Book an Oslob Tour before getting to Cebu City.
Days 20-21: Manila
Give yourself a good 2-day cushion in Manila before your flight out of the country. Philippines is known for its calamities like hurricanes and volcanic eruptions that delay flights. When I These two days are based on an itinerary I created in this Manila Travel Guide. Use it as a suggestion for planning your trip.
How to Get to Manila from Cebu City
The only way is to fly. You can take a flight from Cebu City in the evening on day 19 or early in the morning on day 20. Read my Manila Itinerary guide for ideas on getting from the airport to your hotel.
Check flights on Skyscanner or 12Go.
Where to Stay in Manila
I’ll briefly repeat what I wrote on Day 1 of this itinerary. Stay in the Makati area or around Intramuros. I stayed at Lub d’Philippines Makati (Hostel World | Agoda | Booking.com). However, if you want something more upscale, try this mid-priced hotel called City Garden (Agoda | Booking.com) or this even nicer I’M Hotel (Agoda | Booking.com).
Manila Itinerary
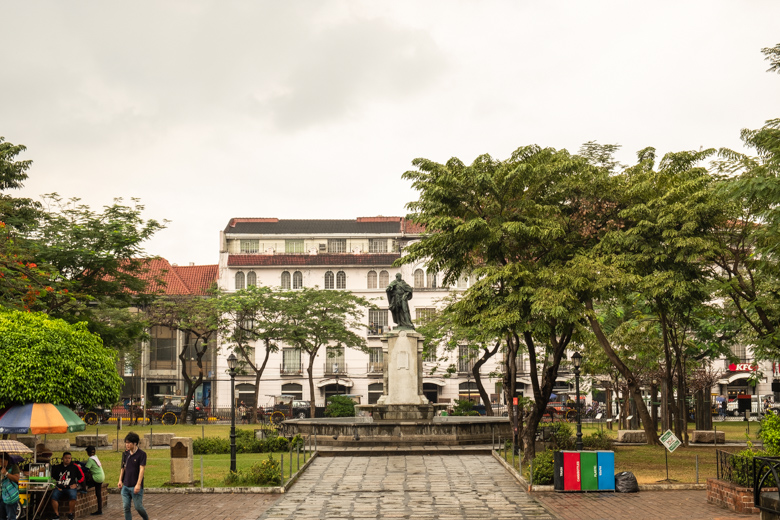
Manila is an old city, but unfortunately, many of the old buildings were destroyed during World War II. There’s not much history left except for a small part called Intramuros. For details, check out my Manila Itinerary here.
Day 20: Walking tour or this popular bike tour of Intramuros and if you didn’t do it on day 1, go on a food tour. I loved the one I did of Chinatown. Don’t skip watching the sunset over Manila Bay.
Day 21: Check out the parks and museums of Manila and the Chinese cemetery
Manila Tour Ideas – Here are some more tour ideas for Manila.
Departing the Philippines
Finally, you’ve made it. The last thing to do in the Philippines is to get yourself to the airport on time.
I suggest using the rideshare service, Grab (just like Uber) to get you there. If you don’t have the app already on your phone, you can have your hotel or hostel contact them for you.
My Grab ride left for the airport at 5:55 am and arrived at around 6:30 am, costing me 286 pesos (US$6). My flight was on a Saturday morning when traffic was at Manila’s lightest. During the weekday, expect your Grab to take 1 to 2 hours to get to the airport, and also be aware that it sometimes takes Grab 30 to 45 minutes to even pick you up. AND if you’re leaving at rush hour, don’t even count on a Grab being available AT ALL.
Philippines Travel Guide & FAQs
- Do I need a Visa?
- What languages do people speak?
- Where can I find ATMs in Cebu
- How’s the internet in Cebu?
- Is it safe for female solo travelers?
Do I Need a Visa for the Philippines?
For most nationalities, you don’t need a visa. You’re automatically given 30 days. If you want to extend, you can do that at immigration offices throughout the country. I did my Philippines extension in Puerto Princesa. However, if you want to stay longer than 60 days, it gets really expensive.
What Languages Do People Speak in the Philippines
There are two official languages: Tagalog and English. Most people speak some English and most signs are in English, making the Philippines one of the easiest places to travel.
People in Cebu do speak their own dialect of Tagalog called Cebuano.
Finding ATMs in Cebu
I had no problems finding an ATM in the Philippines. The only time there was no ATM for me was on the islands of Pamilacan and Kalanggaman. But there were ATMs in Bohol, Moalboal, Malapascua, and Siquijor.
Internet Access in Cebu
I wish I could say that internet access won’t be a problem for you on Cebu and its surrounding islands. But it probably will be. The Philippines has pretty much the worst internet infrastructure in Southeast Asia. I’m not even sure they have 3G. And WiFi in hostels and hotels is usually only available in the lobby or reception area. Not in your room!
When you arrive in Manila, you can buy a SIM card at the airport. There are two companies: Globe and Smart. Each sells about 10 or 12 GB of data for around 1,000 pesos (US$20). It’s good for a month. I used less than 3 GB of my data in the first month I was in the Philippines.
Which is better, Globe or Smart? I got Globe, but Smart had a better deal at the time. I didn’t check well enough because I had read on a Tripadvisor forum that they always have the same rates. They don’t. It’s easy to check because the two companies usually have their booths next to each other at the airport. If they don’t, just walk a few meters and you’ll find the other one.
People say that Globe works well on some islands, while Smart works better on others. If you see Globe signs everywhere, then probably Globe works better in that location. I noticed that Smart signs were everywhere in El Nido, and I had trouble using my Globe SIM card there. On Cebu, I noticed Globe signs everywhere and my Globe plan worked better in this area of the Philippines than on Palawan.
Traveling Solo in Cebu
Overall, as a solo female traveler, I felt safe and comfortable traveling around Cebu and its surrounding islands. The only annoyance was constantly being asked where my husband was and why I was alone.
You’ll find the islands also have lots of tours that you can join to visit the other attractions like island-hopping tours, canyoneering at Kawasan Falls, and kayaking down mangrove-lined rivers at night. If you want to arrange your own private tour, it can be tricky because you’ll need to get a group of other travelers together to make the tour affordable. If you’re shy like me, this can be hard to do.
You can read more about my experience in my Solo Travel Guide to the Philippines here.
Final Thoughts on 3 Weeks in the Philippines
There you have it! I hope this travel guide helps you in planning your trip to the Philippines.
In case, you want to quickly flip back to specific days in this 3 weeks in the Philippines itineray:
- Day 1: Manila
- Days 2 – 6: Bohol & Pamilacan Islands
- Days 7 – 10: Siquijor & Apo Islands
- Days 11 – 12: Moalboal
- Days 13 – 17: Malapascua & Kalanggaman Islands
- Days 18 – 19: Cebu City & Oslob
- Days 20 – 21: Manila
You could do the Oslob tour from Moalboal and spend less time in Cebu City or you could skip Moalboal and do a tour of it from Cebu City. This would give you more time to spend on Bohol, Siquijor, and Malapascua.
Which of these stops in the Philippines was my favorite?
- I loved Bohol for its diversity – so much to do on the island!
- I loved how laid-back Siquijor and how placid the ocean was.
- I’ll never forget Kalanggaman Island. Malapascua also has some nice beaches.
- Wildlife: Sea turtles, tarsiers, whale sharks, sardine run, and the thresher sharks!
By the way, if you’re looking for more info on the Philippines, check out my Philippines Travel Guide page.
Best Resources for Planning Your Trip to the Philippines
Book Your Flight to the Philippines
Use Skyscanner to find the cheapest flights to the Philippines. They will turn up results for all airlines including major ones and local airlines. You’re going to find EVERYTHING that’s available and thus get the cheapest price.
Book Your Accommodations for the Philippines:
The best hotel booking sites for the Philippines are Agoda and Booking.com. Both sites have the biggest selection, and they consistently churn out hotels and hostels at the lowest prices of any other booking site. Another website for backpackers and budget travelers is Hostel World.
Book Your Tours for the Philippines:
The three best tour booking sites for the Philippines are Viator and Get Your Guide. Viator has the biggest selection. Get Your Guide has terrific customer service. They will help you if you have trouble with your tour, especially if the tour company cancels your tour or doesn’t show up. I also like using Klook for booking tours in Southeast Asia.
Buy Your Ferry and Shuttle Tickets for the Philippines
Check ferry and shuttle schedules and buy your tickets on 12Go. It saves you from having to trek all the way to the ferry terminal or bus station to buy your ticket.
Stay Connected When in the Philippines:
To have access to the internet while you’re out and about in the Philippines, get a physical SIM card or an eSIM. I was very happy with the eSIM that I used from Airalo, so I can highly recommend them. Their instructions weren’t the most user-friendly, but the eSIM worked as well as any physical SIM card I used.
Are you on Pinterest?
Hey! How about saving one of these pins to Pinterest to read for later?
And feel free to follow me on Pinterest, where you'll find lots of travel articles for everywhere around the world.
More Travel Guides for the Philippines:
- Learn how to take public transportation and a Grab and taxi around Manila - First-Timers Guide to Getting Around Manila
- Manila Itinerary: 2 Days Exploring the Culture and History of Manila - In this guide, you'll get a detailed step-by-step itinerary for seeing the sights in Manila.
- Port Barton Itinerary: What to do for 3 Days in Port Barton - Find out how to discover the most beautiful beach in the Philippines.
- One of my favorite experiences in the Philippines was an island-hopping tour of Sibaltan. Get the details here: Sibaltan Tour: Finding Your Secret Paradise in Palawan, Philippines
- El Nido Itinerary: An Adventure of a Lifetime - Learn where to go, what to eat, where to see, and of course, what to do in El Nido.
- Bohol Travel Guide: Exploring the Natural Wonder of the Philippines will tell you exactly what to see and do in Bohol, how to get there, where to stay, and much, much more!
- Siquijor Itinerary: Exploring the Island of Fire will give you the skinny on everything you need to know to travel to Siquijor.
- Malapascua Itinerary: Plan Now! Go Later! will help you plan your trip to Malapascua and Kalanggaman Islands.
- Find out what my 15 favorite places to visit in the Philippines are.
- Solo Travel Guide for the Philippines will give you some pointers on how to best travel solo in the Philippines cheaply and safely and still have a kick-ass time!













What an excellent post. I think we do need to think ahead and plan as I really think travel will be back on all our agendas soon enough. One day I would love to visit Cebu as I have a friend living there.
Thank you! I hope you have a chance to get to the Philippines. It always helps to have friends in places that you are visiting.
Your post reminded me of my time in the Philippines. I can’t wait to go back again and visit some of the places I missed and found in your article 🙂
Thank you! I’d also love to go back and explore more of the country.
OMG! Wow! We have friends who recently purchased a piece of land in the Philippines and can’t wait to make a huge trip out of it!! Thanks for this great itinerary!
You’re welcome! Your friends are so lucky! I hope you have a chance to visit them.
This is a great itinerary with some priceless information as some of these journeys don’t sound straightforward. I have never been to the Philippines but would love to go someday soon when we can travel again. Some of these islands look so idyllic. I was lucky to see a tarsier in Borneo a few years ago & just fell in love with these cute & beautiful creatures. Swimming with sardines looks amazing & staying overnight on the sandbar island sounds right up my street. Thank you for this excellent itinerary, I look forward to following in your footsteps one day!
Hey Sue,
Thanks so much! I didn’t know you can find tarsiers in Borneo. I’d love to travel to Borneo one day.