Tokyo Itinerary: How to Spend 4 PERFECT Days in Tokyo

There is so much to do and see in Tokyo that it can be hard to plan a trip there. But at the same time, because there’s so much to see in the rest of Japan, you’ve got to limit your time in Tokyo. In this post, I’m going to help you squeeze everything you should see into a Tokyo itinerary of 4 days.
This Tokyo itinerary is great for those who want to explore Japan’s culture, history, and food. I’ve got tons of recommendations for places to eat, neighborhoods to explore, and museums to discover.
Let’s get started by learning what to see, where to eat, and how to get around this amazing city.
This 4-day Tokyo itinerary is also part of my 3 weeks in Japan itinerary. Check it out!
And if you’re looking for the perfect place to stay in Tokyo, you can find one in this article about how to find the best places to stay in Tokyo.
BONUS: I've created a FREE PDF version of my Japan itinerary guide. It includes detailed day-to-day itineraries for Tokyo, Kyoto, and 9 other destinations in Japan. You'll also get step-by-step instructions for buying and using your Japan Rail Pass.
Disclosure: This post may contain affiliate links. As an Amazon Associate and a Bookshop.org Associate, I earn from qualifying purchases. Please see this website's Disclosure for more info.
Tokyo Itinerary 4 Days Overview
Click on the day to jump to that section of the itinerary. You can do this itinerary in any order.
Day 0 – Airport arrival, airport transfer, and hotel check-in
Day 1 – Historical Tokyo Itinerary – Asakusa (1) Ueno (2) Yanaka (3) Tokyo Sky Tree (4)
Day 2 – Modern Tokyo Itinerary – Harajuku (5), Shibuya (6)
Day 3 – Cultural Tokyo Itinerary – Tsukiji (7)- Ginza (8) – Akihabara (9)
Day 4 – Food and Fun Tokyo Itinerary – teamLab Borderless (11) – Shinjuku (12)
The above itinerary depends on where you’re staying. If your accommodation is in the Shinjuku area, I’d move (12) Shinjuku from Day 4 to Day 1.
You can add a fifth day to your Tokyo itinerary by taking a day trip to Mt. Fuji, Hakone, Kamakura, or Nikko. All 4 of these cities are just 1 to 2 hours by bus or train from Tokyo. Read how to visit them in this 4 Best Day Trips from Tokyo.
Day 0: Airport & Hotel Transfer
When you arrive at either the Narita Airport or the Haneda Airport, you’re going to need to take care of the following things before heading to your hotel/hostel:
1. Pick up Your Pocket WiFi or SIM Card
Order a pocket WiFi or a SIM card before your trip to Japan and pick it up at the airport. You’ll need Wi-Fi when you’re out and about trying to find your way or checking train times.
I bought my pocket wifi from Japan Experience.
Get an eSIM
A third way is even easier. You can get an eSIM and not worry about having to pick up anything at the airport. Before leaving your home country, you purchase an eSIM with Klook or Airalo.
2. Validate Your Japan Rail Pass
Don’t leave the airport without validating your Japan Rail Pass at the Japan Rail office.
When you validate your pass, you can choose which day it begins. You don’t have to start the ticket on the day you validate it.
I bought my Japan Rail pass from Japan Experience. You can also buy your pass through the very reliable Klook.
3. Make Seat Reservations for Future Trail Travel
If you have a Japan Rail Pass, make seat reservations for future train travels at the Japan Rail office. Seat reservations are free for Japan Rail Pass holders. You can cancel or change them free of charge.
4. Get Some Japanese Yen
Get some Japanese currency from the many ATMs around the airport.
You can also obtain Japanese yen from ATMs at convenience stores like Family Mart and 7-Eleven after you arrive at your hotel, but it’s advisable to have some yen on hand right away.

5. Get a SUICA or PASMO Card or an Unlimited Train Ticket
There are 2 types of transportation cards you can get at the airport in Tokyo:
- Unlimited Metro Pass (1-day, 2-days, or 3-days)
- IC card – Suica or PASMO
Unlimited Metro Pass for Tokyo
I used an Unlimited Tokyo Metro Pass (US$10) both times I was in Japan. It’s very convenient and a good deal. You don’t have to buy a new subway ticket every time you ride the subway.
You can get a Pass for 1 day, 2 days, or 3 days.
The Pass gives you unlimited train travel on the Tokyo Metro Line and the Tokyo Toei Line. It doesn’t include JR trains like the Yamanote Line.
IC Card – Suica or PASMO
Your second option is to get a Welcome SUICA or PASMO Passport card at the airport. SUICA and PASMO cards are used for taking public transportation like the subway, trains, and buses around Japanese cities. To use the card, load money onto it at a subway station and tap it at the subway gate to get on the subway. You can also use the card to buy stuff at convenience stores or from vending machines. They are good for 28 days.
Unfortunately, it’s still hard to find Suica Cards in Japan. If you arrive at Haneda Airport, you can get a Welcome Suica card, but they are not available at Narita Airport. If you have an iPhone you can get a digital Suica card.
6. Stop at the Tourist Information Booth
At the Tourist Information desk at the airport, you can find out how to get to your hotel. I originally got my info from someone on Trip Advisor. They told me the wrong train line! The information desk was correct!
7. Find Your Transport to Your Accommodations
You have several options for getting to your accommodations from Narita Haneda. Most importantly, you arrive within walking distance of your hotel.
I recommend stopping by the airport’s Tourist Information Desk to find out your best option for getting to your accommodation.
Transport Options from Narita
1. Narita Express (¥4,070): buy tickets at the Japan Rail East Service Center office at the airport; a good option if staying in Shinjuku
2. Keisei train (¥2,570) has several train lines. Buy your ticket at the Keisei Skyliner office at Narita. Keisei has a line called the Toie Asakusa line that goes to Asakusa. You can also take the Keisei Skyliner train to Tokyo Station. Buy your ticket on the Skyliner ahead of time through Get Your Guide.
3. Airport Bus TYO-NRT (¥1,300 – 2,600) – The cheapest option is the airport bus. The bus goes to Ginza Station, Tokyo Station, Shinjuku and Disneyland. Purchase tickets at the ticket sales counter from 9:00 – 22:00 or at the bus stop outside of those hours. You can also purchase your bus ticket before your trip through Klook for US$9.15.
Transport Options from Haneda
1. Keikyu Line – Buy tickets at the Keisei Skyliner ticket office.
2. Friendly Airport Limousine (¥950 – Asakusa; Shinjuku ¥1,250) connects to different hotels throughout Tokyo. Please see their website for information.
3. Tokyo Monorail – Take the monorail to Hamamatsucho (¥500) where you then need to transfer to the JR Yamanote train line.
My Experience Getting to/from Narita
I flew into Narita and stayed in Asakusa for my first and second trips to Japan. To get to Asakusa, I took a Keisei train. Keisei trains have many lines, so it can be confusing. The wonderful people at the airport information desk told me to take the Toei Asakusa Line from Narita to Asakusa station (¥1290; over 1 hour). On my first trip, I had to walk 15 minutes to my hotel. But I was too tired to walk, so I got a taxi for ¥960. On my second trip, my hotel was 5 minutes from the subway station.
When I left Tokyo, I was staying in Tsukiji. I took the Narita Express Bus from Ginza station (2 subway stops from Tsukiji; take exit C4 at Ginza) to Narita airport (¥1,000, 1 hour and 20 minutes). The bus ride was so much preferable to the train because I didn’t need to go up and down subway stairs, figure out the ticket machines, and navigate the subway’s maze-like and crowded subway stations.
The second time I was in Tokyo, I stayed in Shinjuku. My hotel recommended that I take the Airport Bus to Narita. The bus had a shuttle that picked me up from my hotel and took me to the bus stop in Shinjuku. It was convenient!
Just make sure to get to the bus stop early as these airport buses can fill up, and if you can’t get on one, you need to wait 30-60 minutes for the next one.
You can also buy your bus ticket online to ensure you can get a seat.
Day 1: Historic Tokyo
Asakusa – Ueno – Yanaka
On day 1 of your 4 days in Tokyo, explore the traditional east side of Tokyo. Start in Asakusa where Sensoji Temple, one of the most important Buddhist temples, is located, then head over to Ueno to visit the Tokyo National Museum before finishing your tour in Yanaka, a very traditional area of Tokyo.
1. Asakusa Area
Start the day in Asakusa, an area famous for being the main temple, merchant, and entertainment area of old Tokyo.
How to Get to Asakusa:
There are two subway lines that get you to Asakusa Station: the Ginza and the Asakusa lines. When you’re inside Asakusa station, follow the signs for exit 1 to get to the temple district. You can also take exit 2 to get to the Asakusa Culture Tourist Center on Kaminarimon Street to pick up a map of the area.

Asakusa is where you’ll find the most important Buddhist temple in Tokyo, Sensoji Temple.
In old times, merchants and craftsmen set up their businesses outside the temple gate. The area near temples was safer than others because warlords would leave temples alone when attacking a community. These areas became known as the mon-zen machi (town in front of the temple gate). The merchant area in front of Sensojii Temple became particularly famous.
Asakusa was also well-known as the entertainment district of old Tokyo. There were many theaters in this area. Behind Sensoji temple was a famous prostitution area.

In the early morning, Asakusa is a wonderfully quiet and peaceful place. It’s so quiet that it’s hard to believe you’re in a city of 9 million people.
At night, just a few locals and tourists are out and about. Locals can drink and eat outside on tables set up in quiet alleyways. However, it’s nowhere near as crazy as Shibuya or Shinjuku.
Is it Safe to Walk Around Late at Night?
I felt completely safe walking back to my hotel from the subway station at around 10:00 pm.
Where to Eat in Asakusa:
- Ippudo – ramen chain restaurant
- Sometaro – Okonomiyaki; really hot inside and often long waits; not ideal for solo travelers as it’s more of a group experience.
- Sushi Zanmai – chain sushi restaurant; I think they have pretty good sushi; get the tuna set for ¥3200; always filled with locals whenever I ate there
- Ichiran – near Ginza station; their ramen is better than Ippudo’s
1.1 Kaminarimon Gate
Start your day off at the Kaminarimon Gate. This is the outer gate of Sensoji Temple.
The Kaminarimon is named after the two statues located on both sides of the gate. The left statue is the god of thunder and the right one is the god of wind. They protect the Sensoji temple from storms, floods, and fire.

1.2 Nakamise-Dori Street
After passing through Kaminarimon Gate, walk up Nakamise-Dori Street to Sensoji Temple.
You’ll see lots of souvenir shops along the way especially ones selling rice cakes and green tea-flavored snacks. Supposedly, this street along with Shin-Nakamise Dori are the best places to buy souvenirs in Tokyo.

Nakamise-Dori Street helped Asakusa become one of the main entertainment areas of old Tokyo.
The story goes that tea shops opened up along the road that led to Sensoji. After the shogun made Edo his capital, more and more people visited Sensoji. They would visit the tea shops on their way to the temple. This increase in business made the tea shop owners quite wealthy.
Naturally, tea shop competition increased as more and more people saw the money-making potential of having a tea shop outside Sensoji. To stay competitive, the owners needed to think of other ways to attract customers, so they started offering other forms of entertainment, hiring young women to serve tea. Sometimes they would offer other services as well and that is how prostitution became part of Asakusa.
You can find out more info on the history of Tokyo from this wonderful website on the history of Tokyo and the history of Japan podcast.
1.3 Senso-ji Temple
- COST: Free
- OPEN: 6:00/6:30 am – 5:00 pm
- SUBWAY STATION: Asakusa Station
- LOCATION: Google Maps
Finally, you’ll make it to Sensoji Shrine. The temple was first built in 628. Like many structures in Tokyo, it burned down many times over the centuries, including during World War II.
Go through the bright red gate called Hozomon Gate, the inner gate of Sensoji Temple.

After you pass through the gate, look back at it and notice the two large straw sandals. The sandals are called o-waraji. People offer waraji to temples to pray for safe travels and healthy legs. Without healthy legs, one can’t work, and if one can’t work, one can’t eat.

Before going into the main hall, get an omikuji, which is a paper fortune.
To get your fortune told, put a 100 yen coin in a slot. Then shake a canister until a wooden stick falls out. The stick contains a number on it that's written in Kanji. Find the drawer that corresponds to the number on your stick. Pull out a paper fortune from the drawer. The fortunes can be both good and bad. Mine was good, but the person I was with got a bad fortune. If you get a bad one, you’re supposed to tie the paper fortune to a nearby rack.
When you enter the huge temple, you’ll notice that there are no Buddha statues even though this is a Buddhist temple.
You’re not allowed to take any pictures of the altar when inside the temple.
1.4 Shin-Nakimise Dori and/or Dembouin Dori Street
After visiting Senso Ji Temple, walk around Asakusa for a while walking under the covered pedestrian-only arcades. These are Shin-Nakimise Dori and Dembouin Doir Streets. They’re full of souvenir shops and restaurants.

If you walk east along one of these streets, you’ll eventually make it back to the subway station.
2. Ueno Area
The next stops on your Tokyo itinerary are the Ueno and Yanaka districts. To get to Ueno, hop on the subway and travel 3 stops on the Ginza line to Ueno station.
Ueno’s subway station was famous after the war for being the place where all the homeless (veterans, widows, and orphans) camped out.
A famous post-WWII black market was also located outside the subway station called Ameyokocho. Today the market is full of discount stores, souvenir shops, and restaurants.
The whole area is now known for a terrific park and several of Tokyo’s best museums.
Where to Eat in Ueno and Yanaka:
- Kamachiku – I ate here. They have delicious soba noodles in a beautiful old building
- Izuei Honten – it’s supposed to have good unagi
- Starbucks – This coffee shop is in a convenient location in Ueno Park
- Hantei – I’ve eaten here. The restaurant is in a beautiful traditional wooden building. Very delicious. It’s a set multi-course meal. A bit pricey. I felt comfortable eating here solo.
- Nagomi – They serve skewers
2.1 Tokyo National Museum
- COST: ¥1,000 (US$7.78 | €7.5 | £6.38); ¥500 for college students
- OPEN: 9:30 am – 5:00 pm (last entry is 30 minutes before closing)
- WEBSITE: https://www.tnm.jp/
- SUBWAY STATION: Ueno Station
- LOCATION: Google Maps
When you get to Ueno, head to the Ueno-Koen park. There’s a lot to see in the park: a zoo, a lotus pond, and several museums. The park is huge and with such limited time, I suggest going straight to the museum.

Inside the park is the main museum of Tokyo: the Tokyo National Museum. The museum has five buildings with exhibits:
1. Honkan Gallery – Must-see: the “Highlights of Japanese Art” on the second floor. The second floor gives you an excellent overview of Japanese Art from the Jomon period (11,000 BCE – 5th Century BCE) to the Edo period (1603-1868). The first floor is organized by genre, which is also good but not as good as the 2nd floor. One painting not to miss is the Hakusai’s “Great Wave of Kanagawa.” It’s at the end of the tour on the 1st floor.
2. Heiseikan Gallery: This gallery focuses on Japanese archaeology. I’m into archaeology, so I enjoyed touring it. It’s connected to the Honkan by a passageway.
3. Hyokeikan Gallery: This gallery is closed unless there’s a special exhibition.
4. Toyokan Gallery: This gallery shows art and artifacts from Asia including China, Central Asia, and India. I didn’t get to visit this gallery.
5. The Gallery of Horyuji Treasures: This gallery exhibits 8th and 9th-century objects from Horyuji Temple. Lonely Planet highly recommends visiting this gallery. I did not have time. There is a restaurant on the 1st floor.
The one building that you must start with and go to if you’re limited on time is the Honkan Gallery. It’s the above picture.
You can pay one price (¥1,000 for adults; ¥500 for students and free for children) for all regular exhibits in all galleries at the ticket booth on the right side of the main gate to the museum.
When you get inside the Honkan, you’ll see lockers where you can store your stuff.
Take the grand staircase in the lobby of the museum to the second floor. The second floor gives you an excellent overview of the art from different periods in Japan’s history.
Make sure to get the excellent written guide to the museum on the second floor before you enter the first room.
3. Yanaka Area
After visiting the Tokyo National Museum, explore the lovely and tranquil Yanaka neighborhood.
It’s quite a long walk from the museum to this area. But it’s well worth it. In Yanaka, you’ll get to see a more traditional side of Tokyo. Historically, this area was where the artists of Tokyo lived. It is still home to many artisans making things like pottery, textiles, and traditional cuisine.

There are lots of temples and a cool cemetery in Yanaka.
The food is another highlight of Yanaka. I had some great udon noodles at a beautiful restaurant called Kamachiko and on another visit, I ate at the famous Hantai restaurant.
End your walk at Sendagi Station.
You might be interested in these Japan travel posts:
4. Tokyo Sky Tree
- COST: Floor 350 – ¥2060; Floor 450 – additional ¥1,030. You first need to go to the 350th floor and then buy another ticket for the 450th floor
- OPEN: 8:00-22:00
Finish your first day in Tokyo at the tallest building in the city, the Tokyo Sky Tree. You’ll get some memorable views of the city.

.You can buy tickets online for the Sky Tree to avoid the long lines, or you can buy tickets on the fourth floor at the Sky Tree. They might be sold out by the time you get there, though.
The photo above is from the 350th floor.
PRO TIP: If you are lucky to be in Tokyo in January, March, May, July, September, or November, you can watch a sumo tournament at Ryogoku Kokugikan Sumo Stadium. Check here for how to buy tickets. If you can’t make it to a sumo match, you can always watch the professional sumo wrestlers do their morning training exercises.
Day 2: Modern Tokyo
Harajuku – Shibuya
Spend the second day of your 4 days in Tokyo exploring the modern side of the city with its neon lights, skyscrapers, and hoards of fashion-crazy young people.
I lived in Asia for many years, but I’d never experienced any place as dynamic and as vibrant as Harajuku, Shibuya, and Shinjuku. I’m not into partying and shipping, yet these neighborhoods were two of my favorite areas of Tokyo.
1. Harajuku Area
Harajuku is one of the most fashionable areas of Tokyo with its designer stores and boutiques. However, there’s also a famous shrine, some charming museums, and a fun energetic street full of fashion, food, and young people.
Where to Eat in Harajuku
- Harajuku Gyoza-ro – (Google Maps) – This is where I ate. It’s a famous gyoza restaurant; they’re used to having foreign customers – 6 gyoza – ¥319 – ¥374 (US$2.45/£1.99/€2.32) – What a deal!
- Marion Crepes – (Google Maps) – You can find these crepes all over Tokyo; looking at the plastic replicas of the crepes is almost as fun as actually eating one
- A Happy Pancake – (Google Maps) – I had breakfast here; make sure to try Japan’s fluffy pancakes
- Kawaii Monster Café – They permanently closed as of January 31, 2021. It’s too bad as this was a fun restaurant.
- Afuri – (Google Maps) – I love the ramen here; they charcoal grill the pork and add yuzu to the broth.

1.1 Meiji Shrine
- COST: Free
- OPEN: sunrise to sunset
- SUBWAY STOP: Meiji-jingumae Station or the JR line to Harajuku Station.
- LOCATION OF ENTRANCE: Google Maps
Start day 2 of your 4-day Tokyo itinerary at Tokyo’s most popular shrine, the Meiji Shrine, in Harajuku.

Over 3 million people visit the shrine during the first few days of the New Year. To make the most of your visit, make sure to perform all the Shinto rituals. You can read about how to perform the rituals in my Meiji Shrine guide.

Don’t forget to write your wishes on the votive tablets under the big camphor tree. You can get detailed information about the Meiji Shrine here.
1.2 Omotesando Street
Take a stroll down Omotesando and window shop. You can see lots of designer-brand stores.
Make sure to stop at Kiddy Land— (Google Maps) a 5-storey toy store.

1.3 Explore the narrow side streets
Next, explore some of the side streets off of Omotesando. It’s easy to get lost (I did!), though.
The narrow winding streets are filled with beautiful boutiques, cafes, and restaurants.
Make sure to walk down Cat Street (Google Maps).
What stood out for me was how incredibly quiet it was as if I wasn’t even in a big city. That’s Tokyo. One moment you’re on a street teeming with an ocean of people and cars and the next you are on a quiet street without a car or human being around you.

1.4 Ukiyo-e Ota Memorial Museum of Art
- COST: ¥800 – 1,200 depending on the exhibition (US$6-$9/£5-8/€6-9)
- OPEN: 10:30 am – 5:30 pm
- WEBSITE: http://www.ukiyoe-ota-muse.jp/eng
- LOCATION: Google Maps
Visit the small Ukiyo-e Ota Museum, a museum devoted to beautiful ukiyo-e woodblock prints.
Ukiyo-e means the floating world in Japanese. This was the pleasure world of kabuki actors, geishas, and prostitutes (the outcasts of Edo society) during the Edo and Meiji periods in Japan.
The museum rotates its collection every month.
You could spend about 1 hour here.
1.5 Takeshita-dori

Your final stop on your Harajuku itinerary is a street called Takeshita-dori (Google Maps), which is not far from the museum.
This is Tokyo’s teenage fashion street where young people from all over Japan go to shop.
Be forewarned that the street is jam-packed with people. I loved it.
2. Shibuya Area
The next stop on your Tokyo itinerary is a trip to Shibuya. You can take the subway or walk to get there from Harajuku.
Make sure to stay around the area until it gets dark, so you can see all the neon lights.
Check out the Shibuya Crossing, the famous Hachiko statue, wander around the pedestrian streets, and do a ramen food tour.
I was so tired after my day in Harajuka that I went all the way back to my hotel in Asakusa to rest and then went back to Shibuya later in the evening.
Where to Eat in Shibuya
- Starbucks – A great place to watch Shibuya crossing
- Kamakura – Great ramen restaurant– I ended up eating here both times I was in Shibuya. Decent. Lots of foreign tourists end up here.
- Ichiran – A chain ramen restaurant–for me, they have the best ramen
- 35 Steps Bistro – Izakaya with English menu – Tripadvisor reviews
- Food Show – Supermarket where the bento boxes are discounted after 5:00
- Sushi no midori – I tried finding this place, but no luck. The sushi is supposed to be really good.
- Kaikaya by the Sea – Good seafood
2.1 Hachiko Statue
The story goes that back in the 1920s, a professor had a dog named Hachiko who would meet him every day after work at Shibuya Station. The professor died, but the dog kept on showing up for the next 8 years to meet his owner at the station. Hachiko is a sign of loyalty in Japanese culture. It’s popular to take a photo of yourself with the statue.
2.2 Shibuya Crossing

Shibuya Crossing is famous for the scramble where cars are stopped at all intersections to let all of the pedestrians cross at the same time. Surrounding the crossing are buildings adorned with neon lights and large video screens. For me, it was one of my biggest OMG I can’t believe I’m in Japan! moments in Tokyo.
You can take a rest at the Starbucks that overlooks the crossing and watch people walk back and forth.
2.3 Wander Around Shibuya

After you’ve done Shibuya Crossing a number of times and gotten your photo taken with Hachiko, walk around the back streets of Shibuya taking in the energy of all the people, food, bars, and neon lights.
2.4 Ramen Food Tour

One of the BEST ways to experience Shibuya and Tokyo in general is through its food. Shibuya has a very popular and highly rated food tour devoted solely to one of Tokyo’s most iconic dishes: ramen.
Do you know how many different types of ramen there are?
According to Tasting Table, there are 27 types of ramen. But others say there are 5 main types and 14 regional varieties. Who knows? It’s best to take the tour and find out from the experts. Or you can also visit the ramen museum in Yokohama/
Tokyo Ramen Tours takes you to 3 Tokyo neighborhoods including Shibuya. You’ll visit 3 ramen shops where you get to sample 6 different bowls of ramen as well as learn all about where the popular noodle soup comes from and how it’s made.
Day 3: Cultural Tokyo
Tsukiji – Ginza – Akihabara
Your 3rd day on your 4-day Tokyo itinerary is spent sampling Tokyo street food and experiencing Japanese traditional culture at the Kabuki-za Theater and modern culture at Akihabara.

1. Tsukiji Area
The highlight of Tsukiji is the Tsukiji Food Market. If you have time, also check out the Namiyoke Shrine. The Hamarikyu Gardens are within walking distance of Tsukiji Market but they’re huge so you’ll need 2 or 3 hours to see much.
1.1 Tsukiji Outer Market
Start day 3 of your 4 days in Japan by visiting the Tsukiji Outer Market for some amazing sushi and street food. Make sure you get here before 9:00 am so that you can get to the next stop of your Japan itinerary on time.

Tsukiji Market used to consist of both the Inner Market and the Outer Market. The Inner Market was the wholesale market and it was where the tuna auction took place. That market moved to new facilities at Toyosu Market.
The Outer Market is all that is left. You can still sample street food (tamagoyaki, raw oysters, Kobe beef, sea urchins, and grilled seafood) at the many street vendors or have a sushi breakfast at the remaining sushi restaurants. Many of the famous restaurants moved to Toyosu but still have a branch in Tsukiji.
A great way to explore the market is with this VERY popular and VERY highly-rated guided food tour of Tsukiji (RATED: 4.9/5). You get to learn all about the history of the market and local foods. Plus you get to try lots of different foods: fried fish cakes, a Japanese omelet, Japanese tea, katsuobushi, dashi stock, and a fish bowl (food is included in the price).
2. Ginza Area
Ginza is home to many upscale shops, restaurants, and cafes. It’s considered one of the most expensive pieces of real estate in the world.
Historically during the Edo period, a silver coin mint was located there, hence the name Ginza, which means “silver mint.”
When Japan was opening up to the outside world, the buildings in Ginza became the first ones to be modernized. European-style brick buildings were constructed. The area also became the media center of Tokyo where there wee lots of newspaper and magazine publishers. Unfortunately, during the war, many of these buildings were destroyed by American bombs.
Where to Eat in Ginza:
- Mitsukoshi Department Store – buy some food in the basement and go to the 9th floor to eat it; this is where I ate
- Ippudo – ramen chain restaurant
- Kyubey – sushi – very expensive but cheaper at lunch
- Sushizanmai – great sushi (¥3,000 for a set meal of tuna); picture menus; I ate at their restaurant in Tsukiji, Asakusa, and Shinjuku
2.1 Kabuki-za Theater
- COST FOR SINGLE ACT SEATS: ¥1,200-¥2,600 (US$9 – $18 | €8 – €17 | £7 – £15) depending on the length of the show
- SHOWTIMES: 6 – 7 acts/day; first act: 11:00 am; last act: 8:00 pm
- TICKET SALES: Online the day before the performance; 10:00 am on the day of the performance. Seats are limited.
- WEBSITE: Kabukiza Theater
- SUBWAY STATION: Higashi-Ginza station
- LOCATION: Google Maps
The next stop after Tsukiji is the Kabuki-za Theater in Ginza.
Kabuki is Japan’s traditional dance-drama performance. The stories are historical dramas and comedies set in old Japan. They center around samurai, geisha, and the common people of Japan and involve tales of ambition, betrayal, revenge, and broken hearts.
Watching a kabuki performance was the highlight of my trip. I loved the story, costumes, and acting.
How to Get to the Kabuki-za Theater:
From the Tsukiji Market, it’s a 10-minute walk.
If you’re coming from outside the area, take the subway to the Higashi-Ginza station. The theater is right next to the subway station. Just follow the signs for Kabuki-za.

At the Kabukiza Theater, there are usually 2 Kabuki shows a day:
- Matinee – 11:00 am
- Evening – 4:00 pm
Each show consists of 3 – 4 acts and can last up to 4 hours. Tickets can also be quite expensive (up to ¥17,000)
However, the good news for tourists is this:
Kabukiza Theater has made kabuki more accessible for tourists by allowing them to buy tickets for just one act, meaning you don’t need to stay for the whole 4-hour show. These are called Single Act Tickets.
There are usually 6 to 7 acts per day. Some acts are 30 minutes, while others are 60 to 90 minutes. You can choose to go to any act.
The person who was managing the line for the tickets told me to avoid the 30-minute shows as they’re only dancing.

Shows change each month, and the number of acts per day and start times vary. Check the Kabukiza Theater website for that month’s performance.
To give you some idea of the start times and prices for each act, here they are for November 2023:
Matinee Show
- Act 1 – 11:00 am – 12:32 pm – ¥1,400
- Act 2 – 1:07 pm – 2:07 pm – ¥1,300
- Act 3 – 2:27 pm – 3:30 pm – ¥1,300
Evening Show
- Act 1 – 4:30 pm — 5:35 pm – ¥1,400
- Act 2 – 6:20 pm – 7:40 pm – ¥1,300
- Act 3 – 8:00 pm – 8:59 pm – ¥1,300
How to Buy Single-Act Tickets:
There are 2 ways to buy the Single Act Tickets.
- Reserved Seats – Tickets go on sale at 12:00 pm (noon) the day before the performance. Buy online with credit card. You can buy up to 4 tickets per person.There are 70 reserved seats.
- Non-reserved Seats – Tickets go on sale at 10:00 am on the day of the performance. Cash only. You can only buy 1 ticket per person. There are 20 non-reserved seats.

Although the performances are in Japanese, you can rent a portable translator that translates the whole show. The translation machine didn’t distract me from the show.
3. Akihabara Area
Day 3 of this 4-day Tokyo itinerary ends with a visit to Akihabara.

Akihabara is famous for its electronics, video games, and anime and manga shops. If you want to see the famous maid cafes, then Akihabara is the perfect stop on your Tokyo itinerary.
To get the best experience of this area, take a stroll along Chuo Dori Street.
If you need to buy camera equipment, stop at Bic Camera or Yodobashi Camera.
If you spend at least ¥5000 in one store in one day, your purchase is tax-free. You will need your passport with you to not pay any taxes. You must leave Japan within 30 days.
Day 4: Fun Tokyo
Tokyo Bay – Shinjuku
This is my favorite day of the itinerary because today you’re going to one of my favorite museums in the world and finally to my favorite area of Tokyo, Shinjuku.
1. Tokyo Bay
You’ll be crossing Tokyo Bay to Odaiba, a collection of islands of reclaimed land.

1.1 teamLab Planets or teamLab Borderless
- COST OF TEAMLAB PLANETS: ¥3,800 (US$27 | €24 | £21) for adults; ¥1,300-¥2,300 for children | ¥1,900 disabled person discount
- COST OF TEAMLAB BORDERLESS: Closed until Feb 9, 2024; tickets go on sale Jan 16, 2024 – check website for price
- TIMES FOR PLANETS: 9:00 am – 10:00 pm (every day)
- BUYING TICKETS: teamLab Planets with Get Your Guide; teamLab Planets with Klook
- LOCATION: teamLab Planets; the new teamLab Borderless in Azabudai
Day 4 of your 4-day Japan itinerary starts at teamLab Borderless, a digital art museum. Teamlab Borderless wasn’t in my guidebook when I first visited Japan. But I’d seen so many Instagram photos of it that I had to check it out on my next trip to Japan. Instagram didn’t do it justice.

There are 2 teamLab museums in Tokyo:
- teamLab Borderless
- teamLab Planets
Both museums exhibit interactive digital art. Artwork is displayed digitally on the walls, ceilings, and floors and changes as you move barefoot from room to room. The concept is that there is no border between art, design, and technology and between humans and nature.

teamLab Planets is a temporary museum that focuses on water and flowers. It was supposed to close in 2020 but it proved to be so popular that the museum will remain open until 2027. Wear shorts as you will need to walk through water but not a skirt as the floors have mirrors.
I have only visited teamLab Borderless and loved it! teamLab Planets also gets rave reviews.
Expect to stay between 2 and 3 hours.
It’s very popular so buy your tickets ahead of time. Get Your Guide also sells tickets for teamLab Planets.
Getting to teamLab Planets in Toyosu:
Toyosu is located in Odaiba and often takes 1 hour to get to from most popular tourist districts in Tokyo.
- Take the Yurakucho Line and get off at Shijo Mae Station. Then walk 5 minutes to teamLab Planets
- Take the Yurikamome Line and get off at Shin Toyosu Station. Then walk 1 minute to teamLab Planets or
- Take the Yurikamome Line and get off at Toyosu Station. Then walk 10 minutes to teamLab Planets.
I couldn’t use my 72-hour Unlimited Train Pass on the Yurikamome Line as the pass only works on the Tokyo Metro and Toei Subway Lines.
Getting to teamLab Borderless in Azabudai:
The good news is that teamLab Borderless’s new location is close to Roppongi District which makes it closer to Shinjuku and Asakusa Districts.
- Take the Tokyo Metro Hibaya Line to Kamiyacho Station and take Exit 5 to teamLab Borderless.
- Take the Tokyo Metro Namboku Line to Roppongi-Itchome Station. Take Exit 2 and walk 4 minutes to teamLab Borderless
BONUS: I've created a FREE PDF version of my Japan itinerary guide. It includes detailed day-to-day itineraries for Tokyo, Kyoto, and 9 other destinations in Japan. You'll also get step-by-step instructions for buying and using your Japan Rail Pass.
2. Shinjuku Area
End day 4 of this Tokyo itinerary by touring Shinjuku. This is my favorite area in Tokyo.
The BEST time to experience Shinjuku is at night when the neon lights turn on, the crowds come out, the crazy cafes and izakayas fill with people, and the narrow alleyways with their tiny bars buzz with life.
Yes, you’ll see signs for sex shops, sex shows, host and hostess bars, love hotels, etc. But it doesn’t feel seedy or dangerous even walking alone at night.
The interesting thing is that Shinjuku has always had a shady reputation. It began as a post town on one of Edo’s main highways, where travelers stopped to rest.
Then it became one of Edo’s six licensed pleasure quarters, catering to a more working-class clientele. Soon Shinjuku grew into a bustling area of shops, inns, theaters, and teahouses.
In the late 1800s, its population began to grow when newly built railway lines began carrying passengers to Shinjuku. It grew even more after the 1923 earthquake destroyed much of the eastern part of the city. People started to live in Shinjuku and it lost a bit of its bad-boy reputation.
However, Shinjuku’s shady past came back with a vengeance when immediately after the war, the yakuza opened Tokyo’s largest black market in Shinjuku.
Starting in the 1950s, Shinjuku’s dark alleys with their tiny bars and izakayas have attracted intellectuals and student radicals. Nowadays add a whole bunch of tourists to the mix and you have Tokyo’s version of a red-light district.
Where to Eat in Shinjuku
- Sushi Zanmai
- Fuunji – ramen
- Tsunahachi Shinjuku – tempura
2.1 Kabukicho

Take a stroll around Kabukicho, the Red Light District. Don’t worry about walking around this area by yourself. The streets are packed with tourists. It may be seedier than most other parts of Tokyo, but I felt safe when I was there.
Take a look inside Don Quixote store. It’s a multi-storied store selling everything from food to maid costumes. The aisles are so narrow and jam-packed with goods that it’s difficult to walk down them. It’s not a great store if you’re claustrophobic.
2.2 Omoide Yokocho

The highlight of a tour of Shinjuku is a walk down Omoide Yokocho or Memories Lane. Another name for it is Piss Alley. It’s a very narrow alley lined with red lanterns and tiny bars and yakitori restaurants.
2.3 Shinjuku Golden Gai

Golden Gai is a seedy but atmospheric area of around 200 small bars. Just walk around and find one that seems open to tourists.
I went to Araku Golden Gai bar. Look for the red sign and the red staircase.
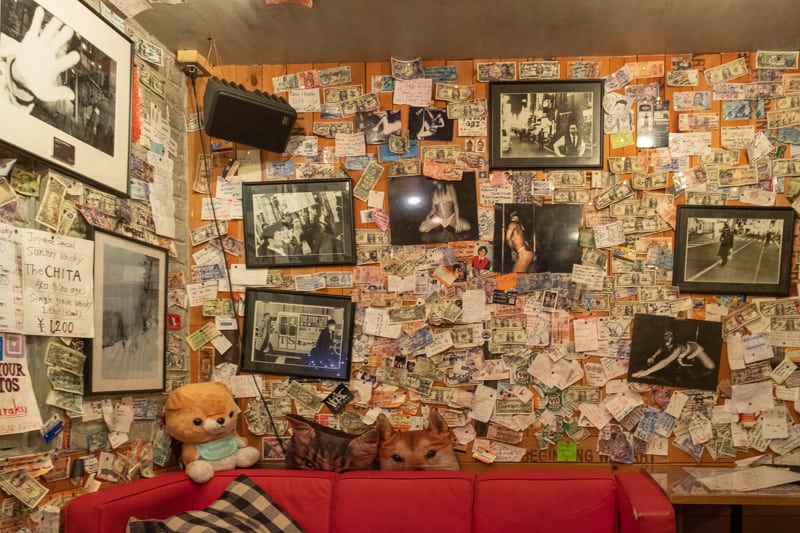
The bartender speaks English and there’s an English menu. When I was in Golden Gai, everyone was excited by the fact that Quentin Tarantino had just been there.
Visiting some of these tiny bars in Shinjuku as a foreigner can be intimidating. Some of the bars would rather you not visit as they’re more for locals. I went to all the tiny bars in Omoide Yokocho and Golden Gai on a guided tour.
Where to stay in Tokyo
One of the hardest decisions to make about Tokyo is where to stay. So, I wrote this post on how to find the best places to stay in Tokyo (even on a budget).
I’ve stayed in three different areas of Tokyo: Asakusa, Tsukiji, and Shinjuku. All of them have their pros and cons. However, I prefer Asakusa for its price and the laid-back vibe of the neighborhood and Shinjuku for its excitement and energy.
My favorite hotel was the Hotel Gracery Shinjuku. It’s the one with the Godzilla head sticking out of it. A bit gimmicky, I know, but you can’t blame the hotel for trying. It’s in the perfect location: right in the heart of Kabukicho and just a five-minute walk from Shinjuku Station.

Final Thoughts: Tokyo Itinerary
After you’ve explored Tokyo for 4 days, where should you go next?
I highly recommend taking a trip to Hakone for 1 or 2 days, where you can soak in a traditional onsen, see some fabulous art, delve into Tokyo’s history, take one of Japan’s most Instagram-worthy shots, and perhaps get a glimpse of Mt. Fuji.
Other amazing day trips or overnight trips close to Tokyo include Kamakura, Nikko, and Mt. Fuji.
If you’re following my 3-week Japan itinerary, your next stop is to visit the Japan Alps and the magical towns of Takayama and Shirakawa-go.
Best Resources for Your Trip to Japan
Book Your Flights for Japan
Use Skyscanner to find the cheapest flights to Japan. They will turn up results for all airlines, including major ones and local airlines. You’re going to find EVERYTHING that’s available and thus get the lowest price.
Book Your Accommodations for Japan:
The best hotel booking sites for Japan are Booking.com and Agoda. They have the biggest selection, and they consistently churn out hotels and hostels at the lowest prices of any other booking site. Another website for backpackers and budget travelers is Hostel World.
Book Your Tours for Japan:
The three best tour booking sites for Japan are Viator, Get Your Guide, and Klook. Viator has the biggest selection. Get Your Guide has terrific customer service. Klook specializes in tours in Asia.
Get Connected when in Japan:
You’ve got 3 options for staying connected in Japan: a pocket WiFi (what I used), a physical SIM card, or an eSIM. Several companies offer eSIMs for Japan. I recommend getting one through Klook or Airalo.
Book your Japan Rail Passes:
Japan has many different types of passes. The JR Pass is one of the most popular passes. Buy them through Klook before your trip to Japan. There are other passes as well, like the Hakone Freepass.
Get Your Rail Pass for Tokyo
Get an unlimited train pass for most metro lines in Tokyo. They’re good for 1, 2, or 3 days. I always get the 3-day pass.
Are you on Pinterest?
Hey! How about saving one of these pins to Pinterest to read for later?
And feel free to follow me on Pinterest, where you'll find lots of travel articles for everywhere around the world.


Looking for more info on Japan? Check out these posts:
- Japan Itinerary: The Perfect 3 Weeks in Japan
- Tokyo Itinerary: How to Spend 4 Perfect Days in Tokyo
- Hakone Itinerary: How to Spend 2 Days in Hakone
- Kyoto Itinerary 4 Weeks: A City of a Million Temples
- Nara Itinerary: The Perfect Day Trip from Kyoto
- Matsumoto Itinerary: Exploring Japan’s Coolest Castle
- Shirakawago Itinerary: Enter a Japanese Fairytale
- The Ultimate Day Trip to Hiroshima and Miyajima
- Kamikochi Hiking: The Perfect Day Trip from Takayama
- Takayama Itinerary: Travel Back in Time to Old Japan
- The Best Ever Guide to Japan’s Tateyama Kurobe Alpine Route
- Top 10 Must-See Places to Visit in Kyoto
- 13 Things You Need to Know Before Going to Japan
- The 20 Best Novels to Read Before Visiting Japan
- A Foolproof Japan Packing List
27 Comments
Submit a Comment
About the Bamboo Traveler

Welcome to The Bamboo Traveler, a travel blog dedicated to helping those travelers who want to dig deeply into the history, heritage, and culture of a place. Whether it’s through the pages of your passport or the pages of a book, I’ll help you travel the world and uncover the history, culture, food, architecture, and natural beauty of some of the world’s most fascinating places.


I absolutely love that I sound this post! I have been planning to go in January but then I thought I might as well brave the tourists and go in March. I have been planning to spend exactly 4 days in Tokyo so I am saving this article. thanks for this.
I’m glad this will be helpful! Tokyo is such a great place!
What a great post, so extensive. I absolutely loved Tokyo and I definitely want to go back one day. Didn’t know the Tsukiji market changed location! Reason to go to Toyosu Market during my next visit.
I’m so sad that it has moved. Now it’s kind of out of the way and the new place I hear doesn’t have the character that Tsukiji had.
Thanks for writing such a super detailed post! I can’t wait to visit Tokyo one day and you’ve given me serious wanderlust!
You should definitely visit! For me, it was one of the most exciting cities that I’ve been to.
Tokyo is number one on my bucket list right now! I really appreciate the time you put into this itinerary– it’s super helpful as a starting point for my trip! I’m especially interested in Harajuku and all the fun cafes!!
Thanks! I hope you get a chance to go soon! It’s a great city!
Great blog. This has been on mutt bucket list for so long.
Thanks! I hope you get a chance to go to Tokyo soon! It’s a great city!
WOW! this is such an incredibly comprehensive and complete itinerary… I’m definitely saving it for when I go to Tokyo! You’ve got me craving ramen too! 🙂
Thanks! Ever since I went to Tokyo, I’ve been craving ramen like crazy! I hope you get a chance to go soon!
You made me miss Japan! I wish I had more time in Tokyo but with only 2 days, I just ate and relaxed. Ha! Saving your post for when I go back for some sightseeing 🙂
I also wish I had spent more time in Tokyo!
Thank you for the wonderful itinerary ideas…gives me a great idea how to plan for my upcoming 4 days in Tokyo! It looks like a great place to visit.
Thanks! I hope you have a fabulous trip to Tokyo! It’s an amazing, unforgettable city.
Tokyo is on our bucket list and your post want me to go and see it even more. Im pinning it for later
Hi Ania,
I hope you get a chance to travel there soon! It’s definitely worth it. I was surprised by how much I loved Japan.
I am staying in Shinjuku now and wondering how to spend a couple of days that are currently unplanned. This is extremely helpful and love that you included restaurants in each area. This is the best article I have found and am planning Kyoto solely from your recommendations also. One thing to include in Tokyo is information on attending baseball games. Can’t thank you enough!
Hi Jill, Thank you so much! I’m glad you found this useful. I’ll be back in Tokyo soon and will hopefully have time to research more places, especially restaurants. I’ll definitely look into including more information on attending a baseball game in Tokyo.
Wow what an amazing write up about Tokyo. Loved the Japan Rail pass, got to see so much more of Japan than I thought during my two weeks there.
Hi Patrick,
Glad you found the JR Pass so useful!
“The wonderful people at the airport information desk told me to take the Toei Asakusa Line from Narita to Asakusa station (¥1290; over 1 hour)”
Hi, can you explain more on this? Because I can’t find the route for it. Does the Toei Asakusa Line included Narita in their map?
Hi Gee,
The Tokyo train system is very confusing. Before my trip, I couldn’t find this route either, but it does exist. A few paragraphs above the quote is a link to the Keisei Electric Railway website that has information on the Keisei train that connects Narita and Asakusa Station. https://www.keisei.co.jp/keisei/tetudou/skyliner/us/traffic/index.php
The people at the information desk called it the Toei Asakusa Line of Keisei Railway. The train arrives at the same station and same tracks as the normal Toei Asakusa Line that you see on the Tokyo subway maps.
Julie
These guides look great. I very much would love a pdf of your Tokyo and Kyoto itineraries but can’t seem to download them. You also should get some kind of compensation for your hard work. Do you offer to guide any trips?????
Thanks
Hi Robert,
Thanks! I’m glad you you found the guides useful. I’m not sure how to download them. I don’t do any guided trips.
This guide is gold! ✨ Thank you, Julie, for such a thorough and down-to-earth itinerary. I love how you’ve mixed iconic landmarks with hidden gems, plus added so many helpful tips (like food stops, exact train lines, and even where to rest). I especially appreciated the insights into teamLab, Yanaka, and Shinjuku’s rich history—your storytelling really brings Tokyo to life. Already bookmarking this for my next Japan trip! Arigatou gozaimasu